Domestic

How to Clean Cloudy Glasses

February 3, 2016

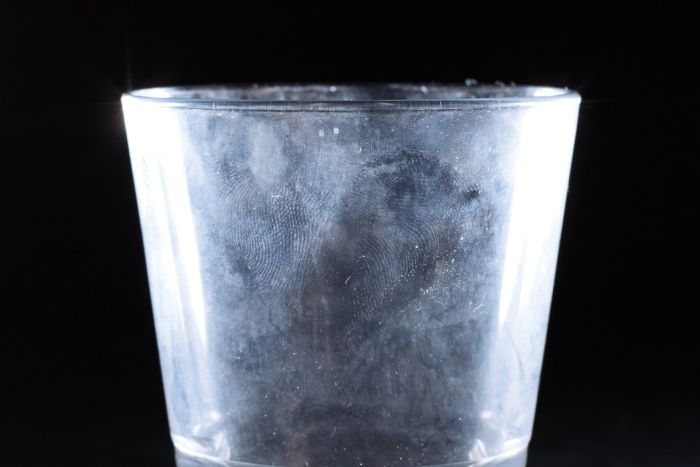
This can happen to us all… You are cleaning up after dinner, run the dishwasher and the next day pull out your glassware to discover them all looking like a cloudy mess.

What’s a girl to do?

Well, there are a couple things…

  1. Tiny scratches in your glassware.
    • These tiny scratches, when mixed with water and detergent can result in a cloudy film. To remove it, rub a washcloth soaked in distilled white vinegar, until the buildup disappears.  But if it’s still there, it probably is your…
  2. Hard water.
    • Add this rinse to your dishwasher to have your glasses coming out as new.
    • We also installed a water softener when we moved into our house and love it.  My mom also came across this cool version, that we’ll definitely look into when our current one gives out.
Tasty

Baked Kale Chilaquiles

February 1, 2016

IMG_5263

Thanks to The Table (and my affinity for all things Mexican food), chilaquiles has quickly soared up my “favorite breakfast foods” list.  The crunchy chips, with avocado, a yummy sauce and a runny yolk are pretty much the best way to start the day as far as I’m concerned.

Sadly, it isn’t the healthiest breakfast option out there… BUT when I came across this version from The Bojon Gourmet that added kale to it, I instantly felt better (funny how that works right?).

IMG_5271

Baked Chilaquiles with Black Beans and Kale
Print Recipe
Servings
4-6 people
Servings
4-6 people
Baked Chilaquiles with Black Beans and Kale
Print Recipe
Servings
4-6 people
Servings
4-6 people
Ingredients
Servings: people
Instructions
Chips
  1. Preheat oven to 400 degrees.
  2. Place tortilla triangles onto a foil lined baking sheet and toss with a heavy drizzle of olive oil. Sprinkle with Maldon sea salt and freshly ground pepper.
  3. Bake until crisp 10-15 minutes.
Chilaquiles
  1. Heat a tablespoon of olive oil in a skillet over medium heat. Add onion and stir for 5 minutes (until tender).
  2. Add kale to onion mixture (along with a splash of water) and stir until wilted.
  3. In a separate skillet (preferably at the same time you are making your veggie mixture), cook your chorizo according to the package's directions.
  4. Once chips have had a minute or two to cool, transfer them to a large bowl and use your hands to toss them with enchilada sauce.
  5. Fold in kale/onion, black beans and chorizo.
  6. Oil a large baking dish and transfer chip mixture (along with any remaining sauce) and bake for 10 minutes or until chips have begun to crisp.
  7. Remove dish from oven and sprinkle with jack cheese.
  8. Gently make 4-6 divots in the chip mixture and carefully crack an egg inside each one.
  9. Return to the oven and bake until eggs have set (around 10 minutes).
  10. Garnish and/or serve with cilantro, sour cream, avocado, salsa, cotija, and lime wedges
Share this Recipe
Powered byWP Ultimate Recipe

IMG_5205 IMG_5213 IMG_5225 Tossing Chips IMG_5240 Kale Casserole IMG_5257

Not only is it super tasty, but it was surprisingly easy to whip up – so no excuses on a lazy Sunday morning to not whip this guy up!

IMG_5266


Domestic

Makeover Monday – Guest Room

December 28, 2015

One of the most exciting things about upgrading our square footage was the fact we could now have a guest room.  We love entertaining and having a special space for our friends and family to stay has been such an added bonus (and one we’ve already got some great use out of in our first couple months here!).

  IMG_4702 Coffee Table Books IMG_4658

Here are some of my guest room tips:

  • Make the space clean and comfortable
    • Try to rid the room of added clutter and knick knacks, and be sure to do a pre-clean before your guests arrive – i.e. clean sheets, mopped floors, etc.
  • Have a space for your guests to keep their things
    • While we utilize half of the closet, I made space for guests to hang their clothing – don’t forget to have extra hangers on hand
    • I also purchased a luggage rack that makes a handy place for guests to store their belongings
  • Have extra blankets and pillows available 
    • We store extras in the closet so they are easily accessible
    • On the same temperature note, it also makes sense to have a fan available for the warm blooded of your guests
  • Keep “extras” available 
    • I have a welcome basket in the guest room with extra toothbrushes, toothpaste, waters, snacks, cell phone chargers, slippers, etc. so they can help themselves without having to ask
    • I also have our Wifi log-in info readily available as well
  • Liven the space 
    • I’m a fan of good smells, so I recommend leaving out a candle (and matches) or a diffuser to help the space feel a little more like home
    • Fresh flowers are a nice touch – I recommend orchids because they have a longer shelf life and help to keep the space pretty for impromptu guests

IMG_4684 Blankets IMG_4690    IMG_4697

Figuring out which room should be the guest room was hardest for us… our relator advised us using our spare room downstairs as the guest room because you should keep “guest quarters” separate.  They can use their own bathroom, come and go freely from the kitchen and it’s helpful to not have everyone on top of each other when we’re getting ready (well I guess literally we are with our two story house… but you get what I’m saying).  So (if space allows), finding a room furthest from your master is a helpful start for determining where your guest room should be!

  IMG_4704

What tips do you have for creating a welcoming guest room?  IMG_4888

Domestic

Makeover Monday – Entry Way

December 21, 2015

Now that J and I are settling into our new digs, I wanted to share our progress with you! Every Monday I will share updates on a new room/space, and show how we’ve redone it and made it our own.  As a first time homeowner, I had no real idea of just what we had gotten ourselves into… but luckily my husband and mom are pros at knowing the right people and getting the job done, so I’m very thankful for everything we’ve accomplished in this short amount of time.  To kick off our first Makeover Monday, I figured I’d start with our entry way (seems fitting right?).

First and foremost, I knew I needed to swap out this guy:

IMG_4811

… to really set the tone of our home.

The hard part was figuring out what to replace him with.  Luckily, I came across 1-800Lighting and my prayers were answered! This family owned and operated company has been in the business for over 90 years (and it’s no wonder) – their selection was amazing, shipping was fast, and the product was so easy to assemble and install!

IMG_4826

IMG_4833

Our home has very traditional bones, so I wanted to spice up the space with this modern Flux 30 Chandelier from 1-800Lighting.  Every time I look at it, I can’t help but smile – it’s so fun and really updates our staircase.

IMG_4835

While we are still trying to track down the perfect mirror and entry way table, but in the meantime am using an old desk and extra mirror as the anchor for our entry space.  Throw a few framed photos and a beautiful orchid and you’re good to go!

IMG_4870

Photos
IMG_4882

My next item on the entry way to-do list is to find a navy runner to cover the stairs in – has anyone installed one themselves or have any suggestions?

IMG_4863

 Financial compensation was not received for this post. While the Flux 30 Chandelier was gifted from 1-800Lighting, all opinions expressed here are my own.